![]()
![]()
Use this procedure to add a Google Map as a pagelet. You can plot important points for your web site's users, adding custom icons to show locations, and providing both map and satellite images.
From the System menu, select the Syndication Manager.
In the Syndication Type drop-down box, be sure you select Pagelets.
From the Use Editor Settings From drop-down, select a site/design template to apply to your pagelets.
Locate the pagelet that will be the parent of this new pagelet and click its (Edit) link.
On the Child Pages tab, mouse over the New button and select Google Map.
Complete the fields in the Page SummaryPage Summary section.
Title - this is a required field. The title you enter here appears at the top of the page you are creating. It is also the text that becomes the link to this page. The font style, size and color are pre-determined by design templates. You cannot change them.
HTML Title - this is optional. The title you enter here can be displayed on your Site Map page. Also, with static type publication of your web site, it is the name that will be given to the HTML page. If it is left blank the HTML file will take the Title field as the file name. Your site administrator can tell you what type of publication your organization does.
On the Sites tab, indicate which sites will be using this new pagelet.
Click on the Content tab and in the General Properties section, enter the optional TeaserTeaser text.
The Teaser field briefly describes the content of the current page.
In the Google Map Configuration section, click on the View Terms link and read the terms of use. Make sure the I Agree checkbox is checked.
Enter a License Key, if you have one. A License Key is only required if your Maps API usage exceeds Google's usage limits (25,000 map loads per day; non-profit organizations are exempt). If you require a license, click the Get a License link to generate a license for your web site URL.
Enter the Centre of Map Latitude and Centre of Map Longitude for the center of your map. Tips!
Select the Zoom Level that the map will be displayed at when first viewed. The default is 15.
Info Message text box:
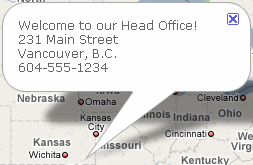
If you check the Show Message checkbox below this field, the text and images you enter in the info Message box are displayed automatically in the center of your map. This window functions like a mini-HTML editor. You can format text and insert images using HTML tags. The resulting window points to the center of your map and displays the message as displayed below:
If you uncheck the Show Message box, nothing will be displayed on the center point of your map.
Set the Map Height and the Map Width in pixels. The default is 240 pixels.
If you want users to be able to navigate around the mini map and zoom in and out, check the Include Navigating Buttons and Zoom checkbox. Note that if you select the large option, the control will only be displayed when users view the larger version of the map.
If you wish to allow users to toggle between Map, Satellite and Hybrid views of the map, check the Include Type Selector checkbox. Hybrid means users will see a satellite image with street names laid over top. If you display navigation, zoom, and type selector buttons, the map will appear as follows. Note that if you select the standard (larger) option, the control will only be displayed when users view the larger version of the map.
If you want to display a ruler indicating the scale of the map, check the Scale Ruler checkbox and select the type of scale ruler to display.
Click Save.
You can provide a link so that users can view a larger version of the map or another map altogether.
Check the Display Link to Larger Map checkbox to allow users the option of viewing a larger version of the map.
In the Link Text box, type in the link text that the user will click to view the larger map.
Select the Other Map option if you have already created a Google Map page that you would like to link to. You can then click the <<Select Page>> link and navigate to the page you wish to use.
Select the Current Map option if you wish to display the same map pagelet only larger. If you select this option you can configure the selectors, navigation tools, map point categories and map points, just as you can for the full-featured Google Map page.
Click Save. If you are finished the page, submit it for publication.
This procedure is only applicable if you selected Link to Current Map in the Larger Map section.
You can create categories to which your map points can be added. For example, if you are a very large organization that has multiple locations of different kinds of stores, you could create a category for each store type. Then each time you add a store location, you can flag it as being part of a particular category.
In the Map Point Categories section, click the Add button.
Enter a name for the category.
Repeat for each category you wish to add.
Click Save to update the categories so that you can assign them to the Map Points.
In the Map Points section, select a category for each of the Map Points.
Click Save.
You can add markers to your map (map points with icons/letters) to indicate important points of interest.
Locate the Map Points section of the page editor.
If you wish to display an icon for each map point you can do so by clicking on the <<Select Digital Asset>> link next to Default Icon.
Check the Letter Points checkbox if you want to display letters (A, B, C, etc) for each successive map point.
For each point you want to add to the map, click the ADD button and complete the fields.
This procedure is only applicable if you selected Link to Current Map in the Larger Map section.
This section allows you to configure a Legend to be displayed on your published map page.